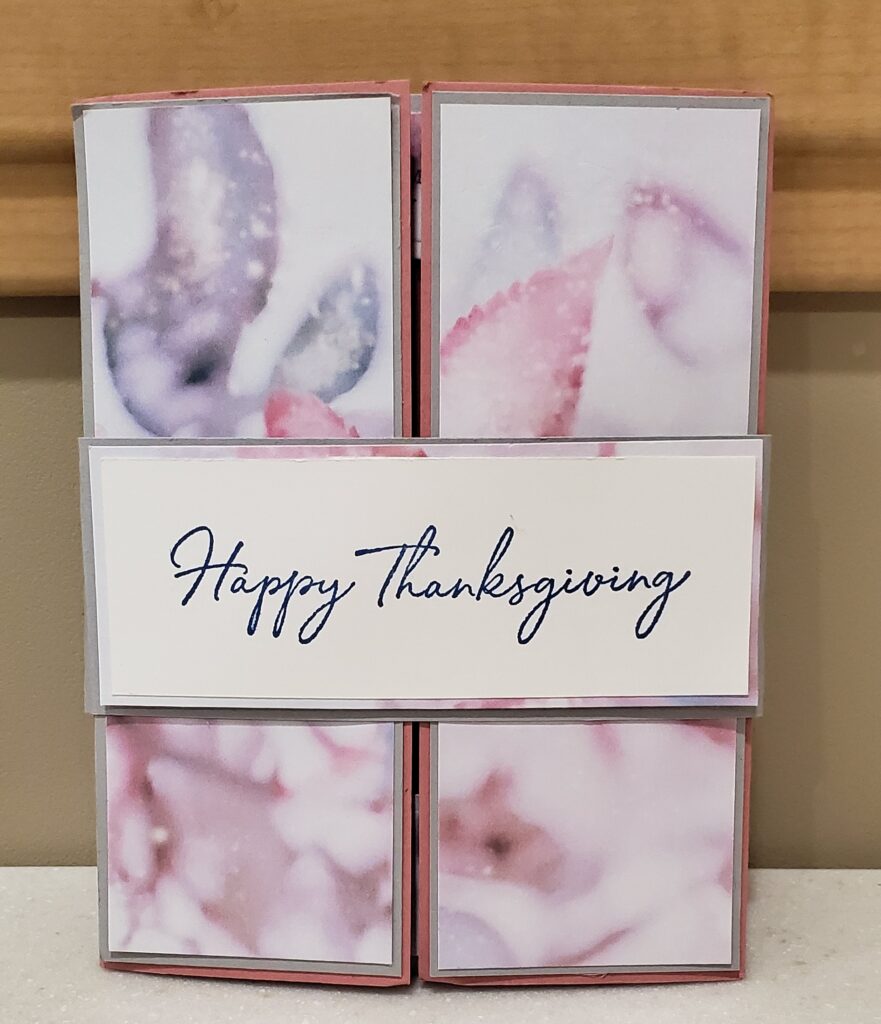
The shutter card is so much fun to make & send! Shutter cards can be adapted to any occasion. You can fiddle with the shutter measurements to make it a bigger open as well.
Recipe:
Card base is 8 1/2″x5 1/2″ scored at 2 1/8″ & 6 3/8″
inside mat is 3 3/4″x5 1/2″ & DSP is 3 1/2″x5 1/4″
reveal behind shutters is 3″x3″ coordinating card
shutters are 4 1/8″x3 1/2″, score at 1/4″ on one side. Outside mat is 2pcs@ 5 3/8″x2″and & DSP is 5 1/4″x 1 7/8″ Belly band is 11″x 1 3/4″, DSP is 4 1/8″x3 1/2″ and whisper white is 4″x1 1/2″
Instructions:
After you score your card base, mark (with pencil) center between the scores and top & bottom. Now let’s work on the shutters. Mark center on your shutters from the scoreline out & top to bottom. Use snips to cut from outer corner to center point to form flag end. You made need to fiddle with this to get a good opening. The flagged ends should overlap completely when the card base is closed and you should do a dry-fit before adhering. Center & adhere your shutters on either side to the outer flaps with tear tape. Set this aside for now.
You will stamp your design to be revealed on the 3″x3″ card stock. Adhere to the center of your card base with snail.
Adhere your DSP to the inside mat cardstock. From here, you will use layering ovals or circles or squares ( your choice) to cut your opening in this mat. Stamp sentiment at the top and/or bottom. Place dimensionals across top & bottom on the backside. Make sure shutter flaps are down and adhere to the inside mat at top & bottom.
Adhere outside mats & DSP to outer flaps with snail.
Stamp sentiment on belly band whisper white & adhere to belly band mat with snail. Adhere this centered to belly band with dimensionals. With card closed wrap belly band around and adhere to self with tear tape. There will be a significant overlap.
Happy Stamping friends!
Francine
Product List


