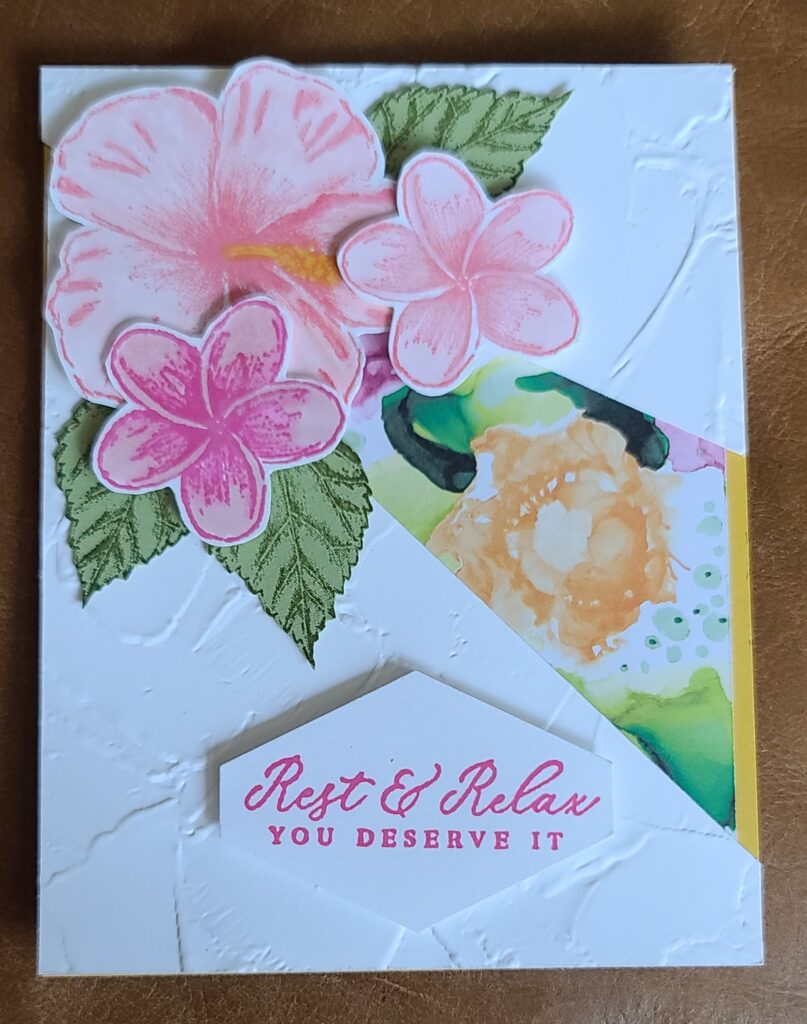
Bumble Bee base 5 ½”x8 ½” score 4 ¼”
Basic White (BW)5 ½”x 4 ¼” & 5 ¼”x4” & 4”x4”
Expression in Ink Designer Paper 5 ½”x4 ¼”
Old Olive 6 ¼”x 2 ¼”
Painted Textured embossing folder
Tailored punch
Mossy Meadow/Flirty Flamingo/Polished Pink inks
Your choice of coloring medium
Seal/Dimensionals/glue
- Flirty flamingo ink stamp the big flower & two small flowers on the BW 4”x4”. Color with your choice of coloring medium. Fussy cut or use the dies
- Mossy Meadow ink stamp three leaves. Fussy cut or use the dies
- Run BW 5 ½”x4 ¼” through the Painted Texture embossing folder. From the bottom left make a tic mark at 4 ¾”, at the bottom right make a tic mark at ½”. From the top right, make a tic mark 2 ¾” and from the top left make a tic mark at ½”. Now cut out that triangle
- Adhere the DSP to the card base with seal. Adhere the painted texture over the DSP aligning the top and bottom so you can see the DSP in the triangle with seal
- Adhere the leaves with glue to the painted texture, then adhere the flowers over top with Dimensionals
- Stamp the sentiment in Polished Pink ink and punch with Tailored Punch
- Adhere the BW 5 ¼”x4” inside and stamp a couple flowers with flirty flamingo ink
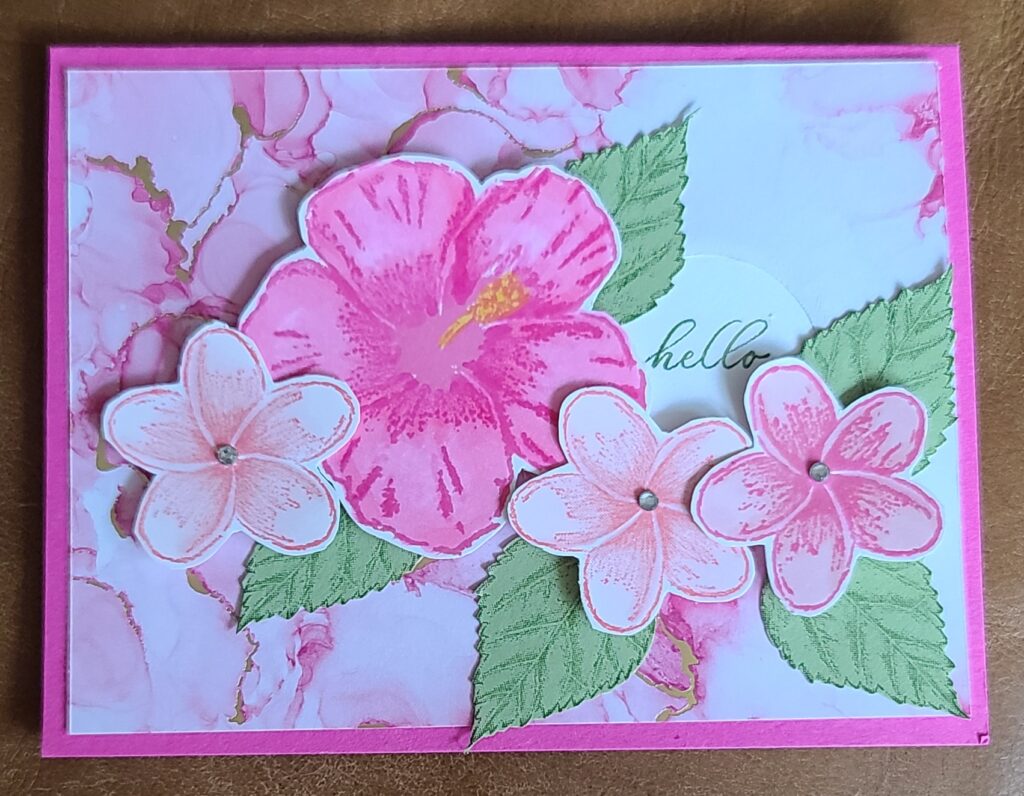
Magenta Madness base 5 ½”x8 ½” score 4 ¼”
Basic White (BW) 5 ¼”x4” & 5”x 4”
Expression in Ink Designer Paper 5 ¼”x 4”
Old Olive 4 ½”x3 ¾”
Layering Circles 1 & 8 (two smallest ones)
Rhinestone jewels
Mossy Meadow/Flirty Flamingo inks
Seal/Dimensionals
- Stamp 5 leaves in mossy meadow inks on the Old Olive.
- Stamp 3 small flowers and 1 large flower in Flirty Flamingo. Color with your choice of medium. Fussy cut or use the dies
- On the DSP (horizontal) 1 ¼” down and ¾” from the right side place the smallest circle and run through cut & emboss machine.
- Stamp sentiment on the remaining piece of BW and use the larger of the circles run through cut & emboss machine. Adhere with glue to the underside of the of the DSP where the circle is cut through
- Adhere the DSP to the card base with seal
- Place your flowers & leaves on the card – remove the flowers – adhere the leaves in place with seal.
- Adhere the flowers with dimensionals around the sentiment
- Adhere the Rhinestones to the small flowers
- Stamp a flower in Flirty Flamingo ink on the 5 ¼”x 4”, mask it and stamp leaves in mossy meadow. Adhere to inside of the card with seal
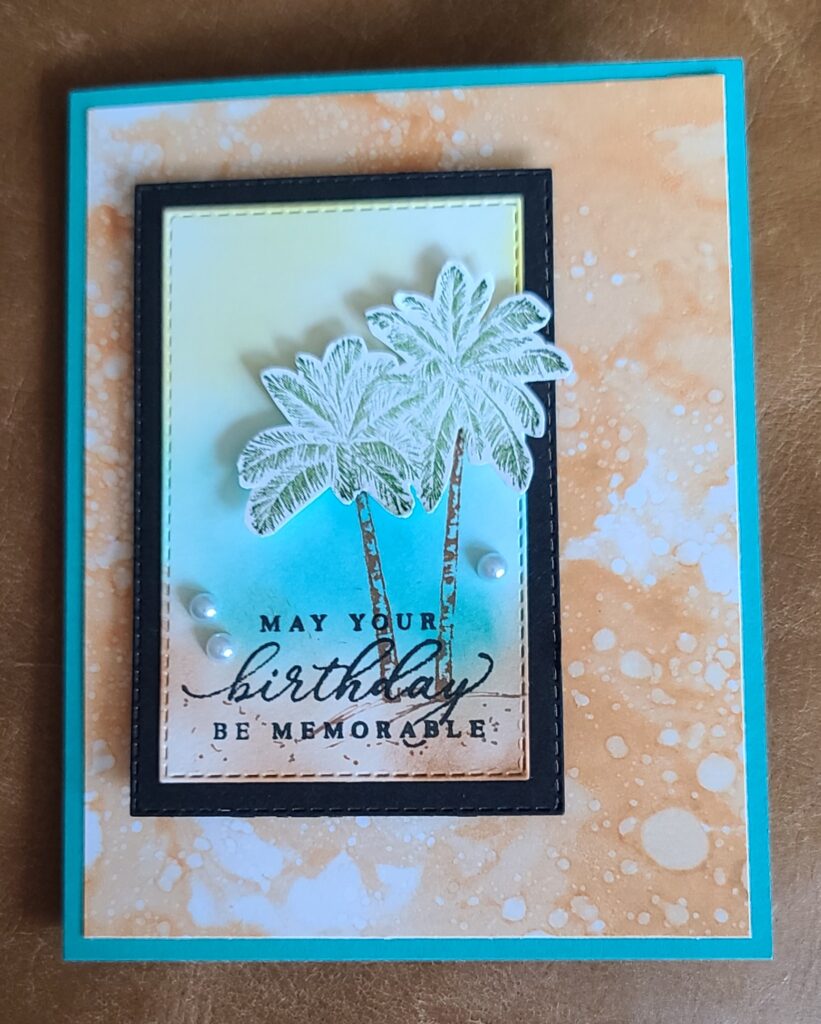
Bermuda Bay base 5 ½”x 8 ½” score 4 ¼”
Basic White (BW) 2 ½”x 3 ¾” & 5 ¼”x 4” & scrap for Palm treetops
Basic Black 3”x4 ¼”
Expression in Ink Designer Paper 5 ¼”x 4”
Stitched Rectangles 4 & 5 (from outside)
Pastel Pearls
Cinnamon Cider/Old Olive markers
Cinnamon Cider/Bermuda Bay/Daffodil Delight/Tuxedo Black inks
Seal/Dimensionals
- Adhere the DSP to the card base with Seal
- Run the black & the BW with the stitched rectangles (black being larger)
- Start with Bermuda Bay ink & lightly create a sea in the middle of the BW. Use Cinnamon Cider ink to create sand and Daffodil Delight to create sunlight at the top
- Color the palms in Old olive and fussy cut them out
- Stamp the trunks in Cinnamon Cider marker to the right of the BW securing to the sand
- Stamp the sentiment over the trunks on the lower portion of the BW. Adhere to the black base with seal. Adhere the palms with dimensionals to the trunks. Add some Pastel Pearls
- Adhere the entire thing with dimensionals to the left side of card base kind of centered
- Color the Palm Trees with markers and stamp on the BW 5 ¼”x 4” and adhere to inside of the card with seal
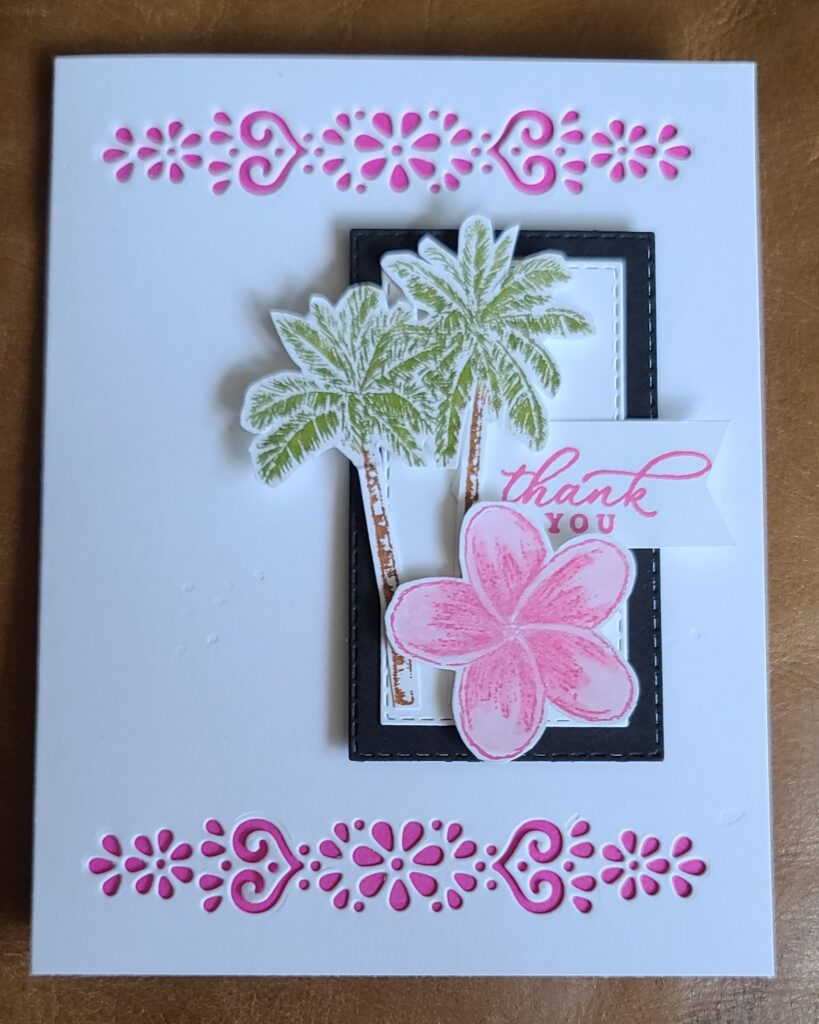
Thick Basic White base 5 ½”x 8 ½” score 4 ¼”
Basic White (BW) 5”x 5” & ¾”x 2” & 3”x 1 ¾”
Basic Black (BB) 3 ½” x 2”
Polished Pink 5 ½”x 4 1/8”
Stitched Rectangles dies (smallest & next size up)
Ornate Layers dies
Polished Pink ink & Cinnamon Cider/Old Olive markers
Seal/Dimensionals
- Run the ornate layers die at the top & bottom (centered)
- Adhere the Polished Pink 5 ½”x 4 1/8” to inside of the front card with seal
- Use the markers to color the palm trees & fussy cut or use dies
- Use polished pink ink (stamp off) stamp the small flower & color with medium of choice – fussy cut or use dies
- Run the BW 3”x 1 ¾” & BB with stitched rectangles. Adhere the BW to the BB with seal
- Adhere the palm trees and flower to the BW with dimensionals
- Stamp the sentiment on the ¾” strip and flag the tail on the right. Adhere with seal just under the palm tree
- Adhere the entire thing with dimensionals between the die cuts on the right side


Daffodil delight base 4 ¼”x11” score 2 ¾” & 5 ½” and ½”x 3 ¾” and 3” x 9 ¾” score 5 ¼’ & 7 3/8”
Basic White (BW) 2 ¾”x 5”, ½”x 3 ¾”, 2 ¼”x 2 ¾”, 6”x 3 ½”
Old Olive 1 7/8”x 2 ¾”, 6”x1 ¼”
Expression in Ink Designer Paper (2) 2 ½”x4” & 5 ¼”x 4”
Color medium of choice Hammered metal embossing folder
Polished Pink ink Pastel Pearls
Seal/Dimensionals
- Adhere the DSP to the card base with seal & set aside
- Stamp & Color your flowers (I used grey granite stamp-off for flowers), fussy cut or use dies
- Stamp your leaves in Mossy Meadow, fussy cut or use the dies
- Run the 2 ¾”x 5” BW through your choice of embossing folder and adhere to the long side of the 3” strip.
- Set your flowers where you want them insert the leaves behind them with seal. Adhere flowers with dimensionals. Adhere the sentiment below the flowers
- Adhere the Old Olive 1 7/8”x 2 ¾” next with seal and then the BW 2 ¼”x2 ¾”
- Adhere the pineapples to the Old Olive with seal
- Use tear-tape on the ends on back of the 3” strip. Fold & center it on the card base & adhere with tear-tape
Get your Craftiness on!
Francine Wilson, Independent Stampin’ Up! Demonstrator
facebook.com/stampscrapgo
[email protected]
Product List

