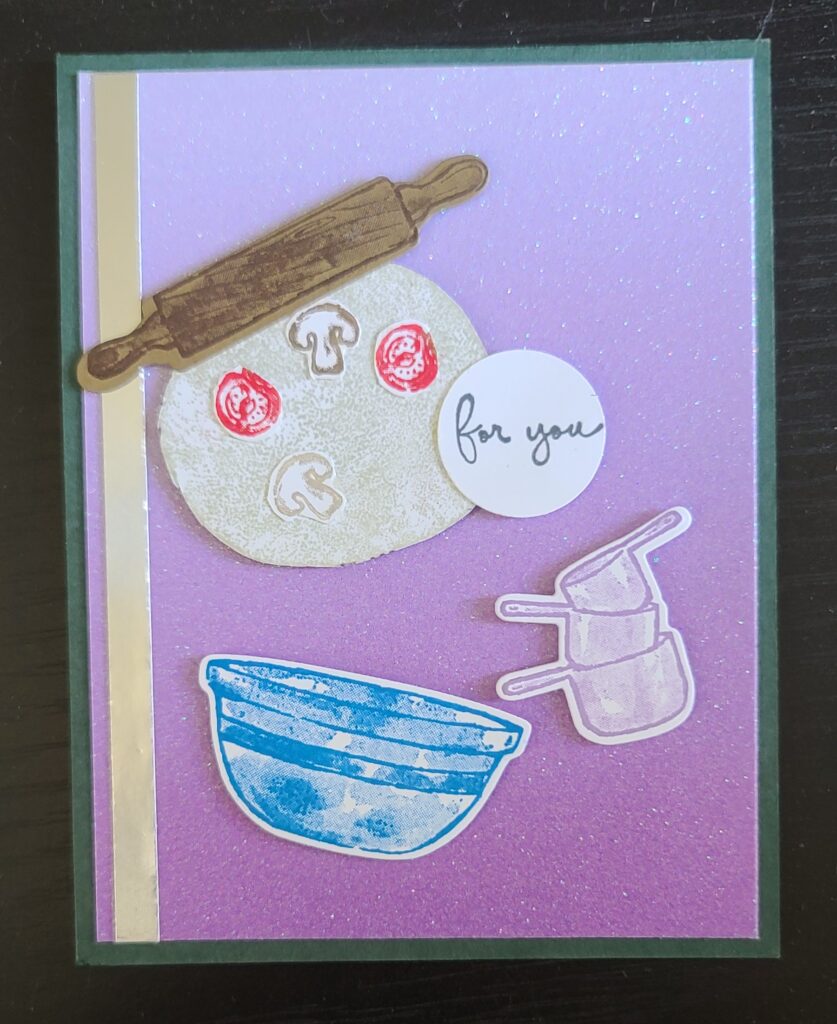
Evening Evergreen base 4 ¼”x11” score 5 ½”
Ombre specialty DSP 5 ¼”x4”
Silver strip ¼”x 5 ¼”
Soft Suede 3”x ¾”
Basic White (BW) 4 ½” square & 5 ¼”x4”
1” circle punch or use layering circle dies
Seal/Dimensionals/Glue
- Stamp the rolling pin in soft suede ink on the soft suede cardstock. Cut with dies.
- Stamp the measuring cups in highland heather, the bowl in Pacific Point. Cut with dies.
- Use a C block with Crumbcake ink – stamp off twice and stamp on the remaining basic white. Fussy cut in a circle (not perfect circle)
- Stamp the mushrooms & tomatoes with Crumbcake & Real Red markers
- The sentiment in Tuxedo Black. Punch with 1 “ circle punch or use dies
- Adhere the Ombre DSP to card base with Seal, adhere silver strip about ¼” from left
- Adhere the bowl, cups, pizza, and sentiment with Dimensionals. Adhere the tomatoes & mushrooms to the pizza with glue
- Adhere the BW 5 ¼”x4” inside the card and decorate as you like
Highland Heather base 5 ½”x8 ½” score 4 ¼”
Pale Papaya Shimmer vellum 5 ¼”x4”
Basic White 5 ¼”x4” & 1 ¾” square
Soft Suede 2 ½”x3 ½”
Basic White 5 ¼”x4” & 3”x ¾”
Basic Grey 1 ¾”x2”
Window sheet 1 ¾”x 2”
Painted Texture embossing folder
Seal/dimensionals/mini dimensionals/glue
- Run the shimmer vellum through the Painted text embossing folder. Adhere to the card base with seal in the center of vellum
- Stamp the spatula on BW 3” strip with grey granite (stamp off), color the handle with your choice of color
- Stamp the wooden spoon in soft suede on soft suede card stock. Run the spoon & cutting board through your cut & emboss machine
- Stamp the salt & Pepper shakers on the basic grey in basic grey ink. Run the window sheet and the basic grey with the die through your cut & emboss machine. I used basic black marker for pepper and punch a bunch of 1/8” hole punch for salt…you don’t need to do this. Cut the top & bottom of basic grey off and adhere to window sheet with glue.
- Stamp sentiment in tuxedo black & polished pink and adhere to cutting board. Tie a bow
- Tie a bow with linen thread around spoon & spatula and adhere all items to the vellum with dimensionals & mini dimensionals
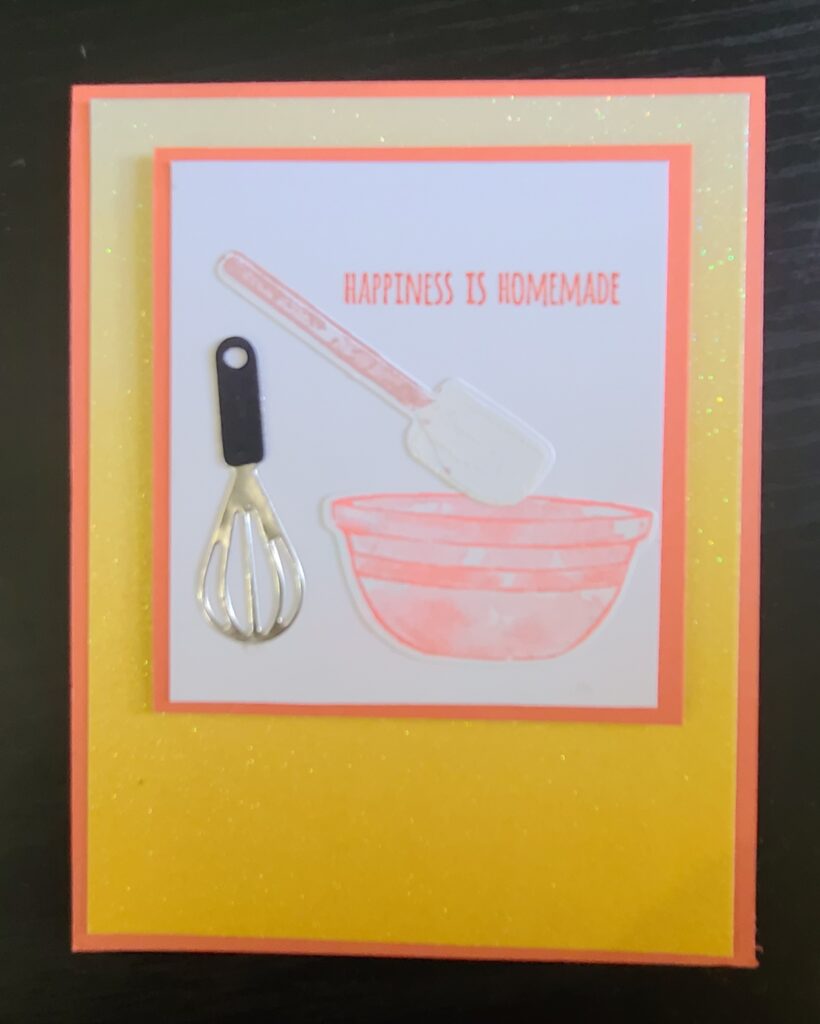
Calypso Coral base 4 ¼”x 11” score at 5 ½” & 3 ½”x3 ¼”
Basic White (BW) 3”x 3 ¼” & 2 ¾” square & 5 ¼”x4” for inside
Silver Foil for Whisk 2 ¼”x1 ¾” & scrap basic black for handle
Ombre specialty DSP 5 ¼”x4”
Seal/Dimensionals/glue
- Adhere the Ombre to card base with seal
- Stamp the bowl in Calypso Coral & cut with die
- Stamp handle of spatula in blushing bride & cut with die
- Cut (2) whisks from silver and hand from scrap black – cut with die & adhere hand with glue
- Stamp sentiment in Calypso Coral ink in upper right on BW 3”x3 ¼”
- Adhere bowl with seal, adhere the spatula & whisk with glue to the BW 3”x3 ¼”
- Adhere the BW to the Calypso Coral 3 ½”x3 ¼”. Adhere with dimensionals to the Ombre
- Adhere BW 5 ¼”x4” to inside card, stamp a bowl in Calypso CoAral at bottom left. Cut a portion of the second whisk off. Adhere with glue it looks like it is in the bowl.
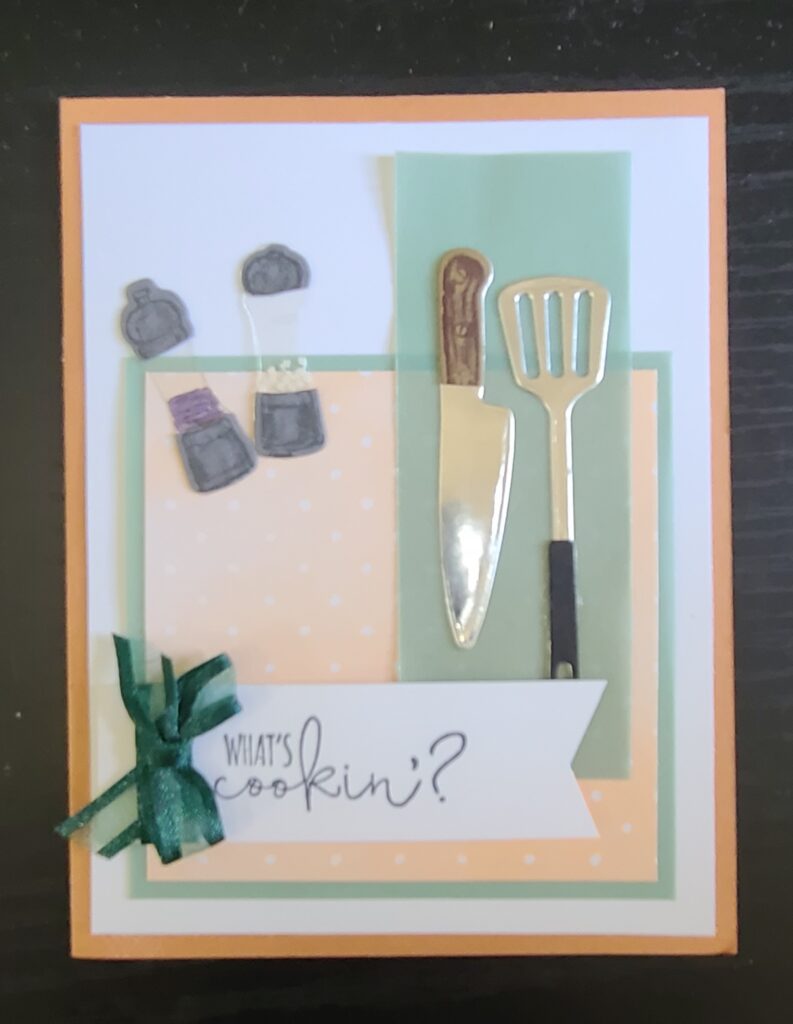
Cinnamon Cider base 5 ½”x8 ½” score 4 ¼”
Soft Succulent shimmer vellum 3 ½” square and 4”x 1½”
Hand penned DSP 3 ¼” square
Basic White (BW) 3 ½”x1” & (2) 5 ¼”X 4”
Silver Foil 1 ½” x 3 ¼” & scrap black for handle & scrap soft suede for hand on knife
Window sheet & basic grey 1 ¾”x2”
Evening Evergreen ribbon 8”
Seal/Dimensionals/glue dots/glue
- Stamp the salt & pepper shakers on basic grey. Cut both window sheet & the basic grey with dies. Cut top & bottom off and adhere to window shakers with glue.
- Stamp sentiment about ¾” from left edge and flag the right side. Wrap 1 ½” of EE Ribbon adhere with seal on back. Tie a bow with rest of EE Ribbon and adhere with glue dots
- Adhere the BW 5 ¼”x4” to card base. Adhere 3 ½” SS vellum it has even border on lower half.
- Adhere the HP DSP 3 ¼” to the Vellum. Vertically adhere the 4” piece with seal in the center to the right side of DSP.
- Cut Silver Foil with knife and slotted turner spatula. Cut handles from basic black & stamp knife hand on soft suede. Adhere with glue
- Stamp the salt & Pepper shakers on the basic grey in basic grey ink. Run the window sheet and the basic grey with the die through your cut & emboss machine. I used basic black marker for pepper and punch a bunch of 1/8” hole punch for salt…you don’t need to do this. Cut the top & bottom of basic grey off and adhere to window sheet with glue.
- Adhere the knife and slotted spatula to the vertical shimmer vellum with glue. Adhere the salt & pepper shakers in the upper left corner of the DSP with glue
- Adhere the sentiment with dimensionals
Get your crafty on!
Francine Wilson
Independent Stampin’ Up! Demonstrator
Facebook.com/Stampscrapgo
[email protected]
Product List

