I love this stamp set. There is so much potential with this set…I was inspired by my friend’s cards and just kept on creating. I videoed the creating of two of the cards, but I designed two of the cards ahead of time. I had a bit of trouble with lighting, but I managed to fix it.
Rococo Rose – Little Note

Thick Basic white card base 4 ¼”x 11” scored at 5 ½”
Rococo Rose 3 ¼” square & 2 3/8”x3/8″
Basic White 3” square & 2 ½”x ½” In Good Taste DSP 5 ¼”x4”
White baker’s twine Seal/Dimensionals/Glue Dots
- On BW 3” square stamp your seed pods in random order and color in with your choice of color medium
- Adhere your stamped image to the Rococo Rose 3 ¼” square with seal
- Add Dimensionals to the back
- Stamp your sentiment on the BW 2 ½” x ½” in Rococo Rose ink, flag your end
- Adhere this to the 2 3/8”x3/8” Rococo Rose card stock, flag the end to match
- Adhere this to the seed pod design and add a bow with bakers twine
- Adhere the sentiment & Seed pod design to the card base centered in the upper portion of the card
Basic Grey seed pods -Friendship
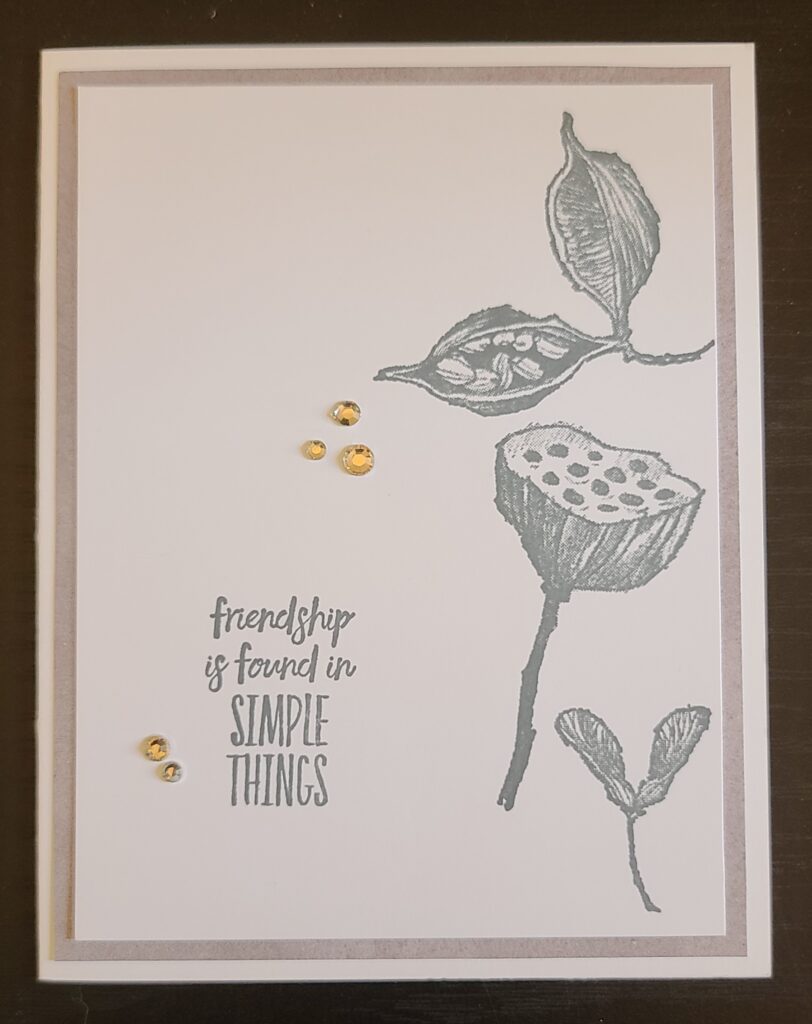
Thick Basic white card base 8 ½”x 5 ½” scored at 4 ¼”
Basic White 3 ¾”x 5” In Good Taste DSP 5 ¼”x 4”
Rhinestone Jewels Seal
Basic Grey Ink
- On the BW 3 ¾”x5” stamp your seed pods down the right side in Basic Grey ink
- Stamp your sentiment in same ink on the lower left
- Add a few Rhinestones
- Adhere your DSP to the card base
- Adhere your sentiment piece to the DSP
Wood background – Good Tidings
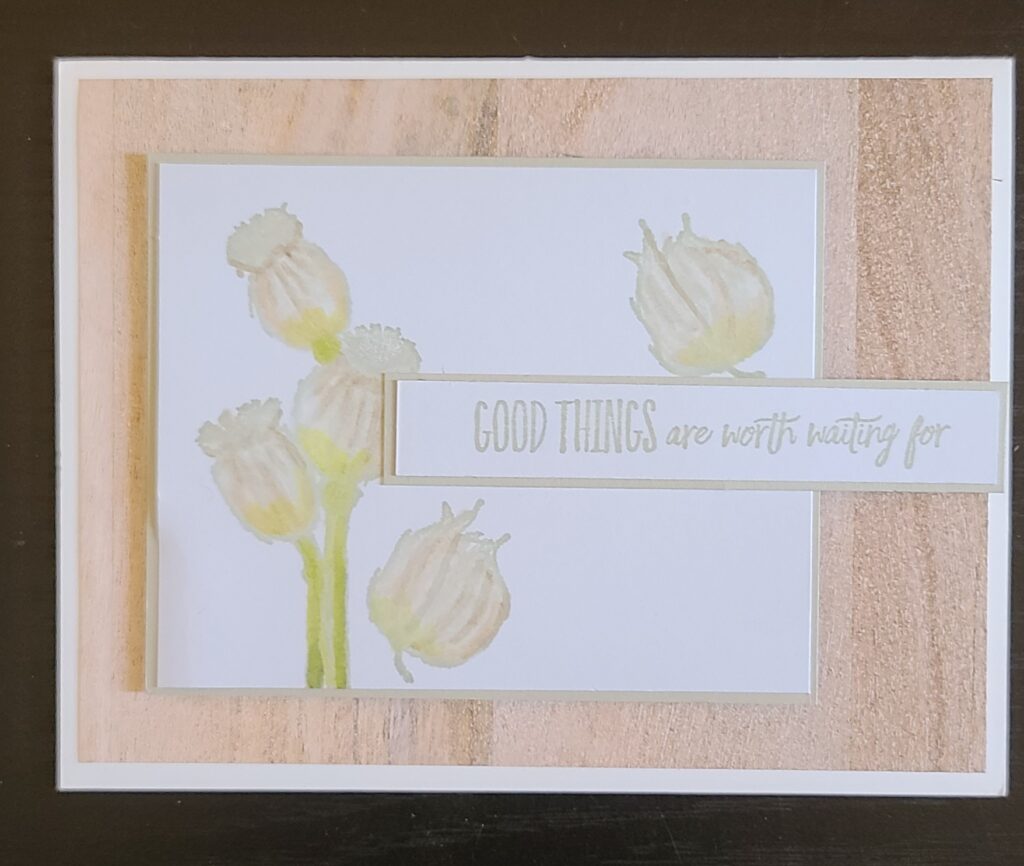
Thick Basic white card base 8 ½”x 5 ½” scored at 4 ¼”
Sahara Sand 3 1/8”x 3 7/8” & 3 5/8”X 5/8” Basic White 3”x 3 ¾” & 3 ½”x ½”
In Good Taste DSP 5 ¼”x4” Sahara Sand ink
Seal/dimensionals
- Adhere the DSP to the card base with seal
- On the BW 3”x 3 ¾” stamp your seed pods randomly (I used the tall one) in Sahara Sand ink & color with your choice of color medium
- Stamp your sentiment in Sahara Sand ink on the ½”x 3 ½” BW
- Adhere both to the respective coordinating Sahara Sand Cardstock
- Add dimensionals to the back of the design on the BW and 1 dimensional to the far-right side of the sentiment and seal on the left
- Adhere the design to the card base (centered) to the left side
- Adhere your sentiment to the middle of the design
Blue denim – Happy Birthday
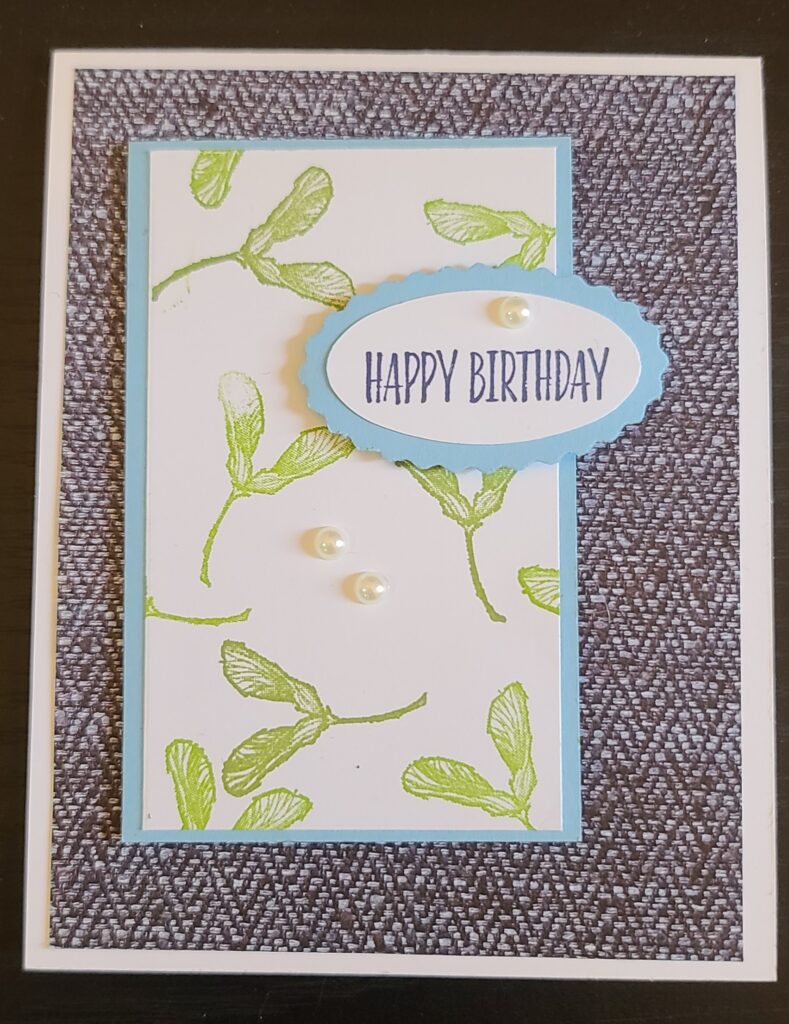
Thick Basic white card base 4 ¼”x 11” scored at 5 ½”
Basic White 2 ½”x 4” & scrap for sentiment
Balmy Blue 2 ¾”x 4 1/8” & scrap In Good Taste DSP 5 ¼”x 4″
Double oval punch Pearls
Night of Navy/Old Olive/Granny Apple Green inks
Seal/Dimensionals
- Adhere the DSP to the card base with seal
- Stamp whirly bird seed pods in Old olive & Granny Apple Green randomly on the BW 2 ½”x4”
- Adhere this to the Balmy Blue 2 ¾”x 4 1/8” & add dimensionals to the back
- Stamp your sentiment on the BW scrap in Night of Navy & punch with the oval punch
- Punch a balmy blue scalloped oval punch & adhere sentiment to that & add dimensionals to the back
- Adhere the design (centered) to the top & left and add the sentiment in the upper portion of the design
- Add a few Pearls
Keep on crafting!
Francine Wilson
Independant Stampin’ Up! demonstrator
Your crafting coach


