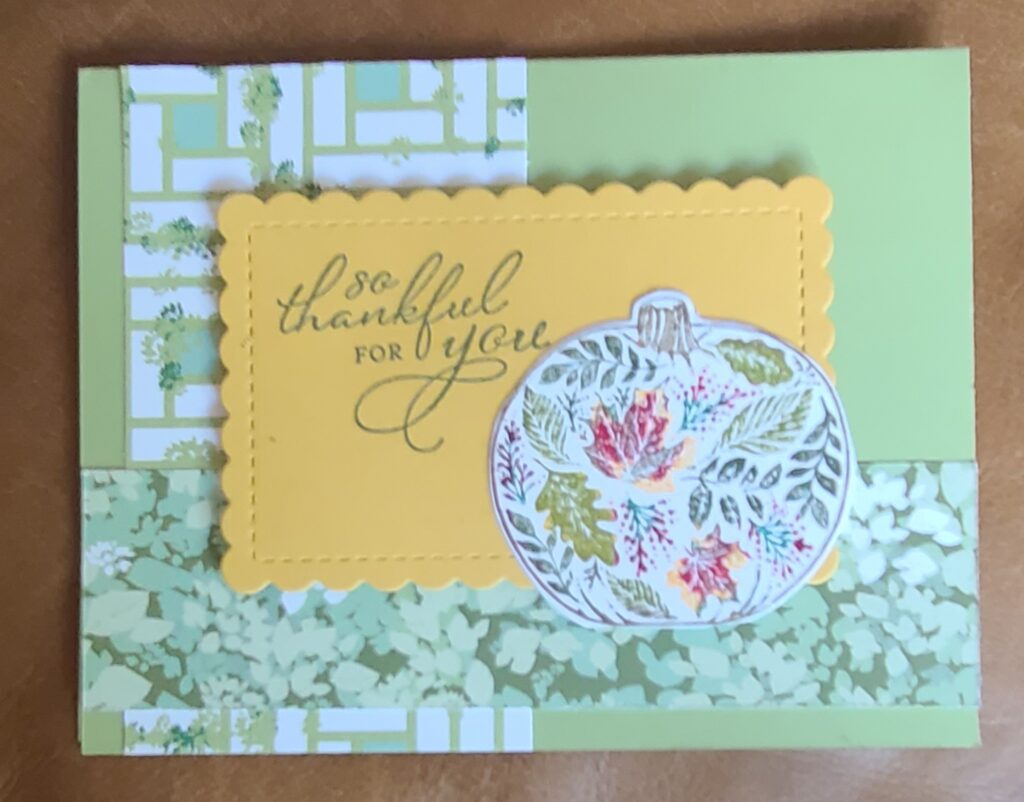
Pear Pizzazz base 5 ½”x 8 ½” score at 4 ¼”
Bumblebee 4”x3”Basic White (BW) 2 ½” square & 5 ¼”x4”
Stampin’ Write Markers
Basic Grey ink
Scalloped Contours dies
Seal/dimensionals
- Adhere the 2 ½”x4 ¼” DSP to left side of front card with ¼” reveal
- Adhere the 1 ½”x5 ½” DSP to the bottom front card with ¼” reveal
- Cut the Bumblebee with 2nd scalloped contour dies
- Stamp sentiment on the upper left corner & add dimensionals to the back
- Color the leafy pumpkin with Markers and huff on it to activate the ink… put it on BW 2 ½” square. Adhere with seal to lower right side of the Bumblebee
- Adhere centered on the front of the card
- Adhere the BW 5 ¼”x 4” to the inside of the card with seal
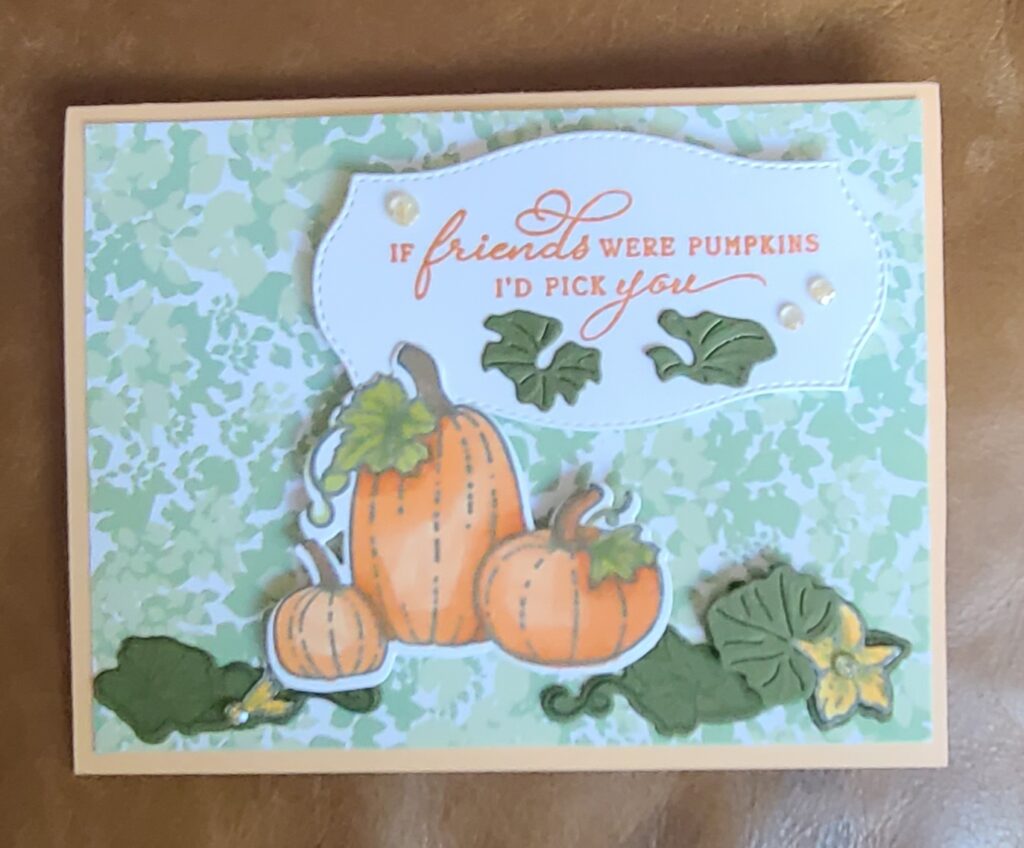
Pale Papya base 5 ½”x8 ½” score at 4 ¼”
Garden Lane DSP 5 ¼”x4”
Mossy Meadow 3” square
Basic White (BW) 4”x 2 ¼” & 3” square & 5 ¼”x4”
Pumpkin Pie & Basic Grey & Mossy Meadow inks
Blends
Wonderful Gems
Tasteful Labels dies
Seal/dimensionals/glue
- Adhere the DSP to the front of the car with seal
- Stamp the tri-pumpkins on the 3” square & stamp the flower from the vines in basic grey. Color with your choice of medium. Cut with dies & fussy cut the flowers
- Cut with dies the 3 different leaves & stamp the vines in Mossy Meadow and cut with dies
- Stamp sentiment on the upper 4”x 2 ¼” and cut with tasteful labels dies. Adhere 2 of the leaves to the sentiment. Adhere wonderful gems, & add dimensionals to the back of label
- Adhere the sentiment to the upper right on the front of the card
- Add dimensionals to the tri-pumpkins & adhere to lower left of the sentiment
- Add the vines to either side of the of the pumpkins & adhere the flower with glue
- Add a dimensional to the 3rd leaf and adhere to the blooming flower.
- Add the wonderful gems to the flowers
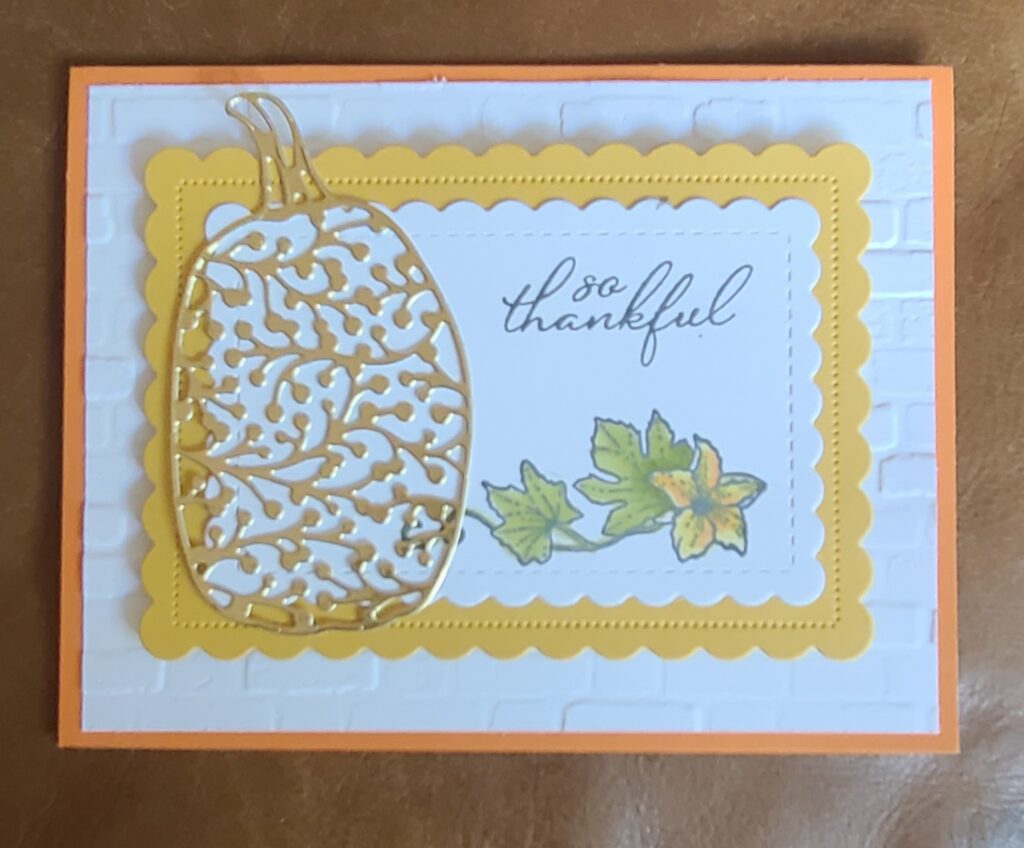
Pumpkin Pie base 5 ½”x8 ½” score at 4 ¼”
Basic White (BW) (2) 5 ¼”x4” & 4 “x 2 ¾”
Bumblebee 4 ¾”x 3 ½”
Gold foils 2 ¼”x 3 ¾”
Brick wall 3-D embossing folder
Adhesive sheet
Basic Grey ink
Blends
Seal/dimensionals
- Use the Brick Wall EBF on the 1 of the 5 ¼”x4”. Adhere to the front of the card with seal
- Run the Bumblebee through 2nd large, scalloped die
- Run BW 4”x2 ¾” through 3rd scalloped die. Stamp sentiment in Basic Grey ink in the upper right side…stamp the blooming flower viny just below it, color with your choice medium
- Adhere with seal the sentiment to the bumblebee
- Put adhesive sheet on the back of gold foil, cut with pumpkin viney-die cut. Adhere to the left of the sentiment
- Adhere the sentiment with dimensionals to the front of the card
- Adhere BW 5 ¼”x4” inside the card
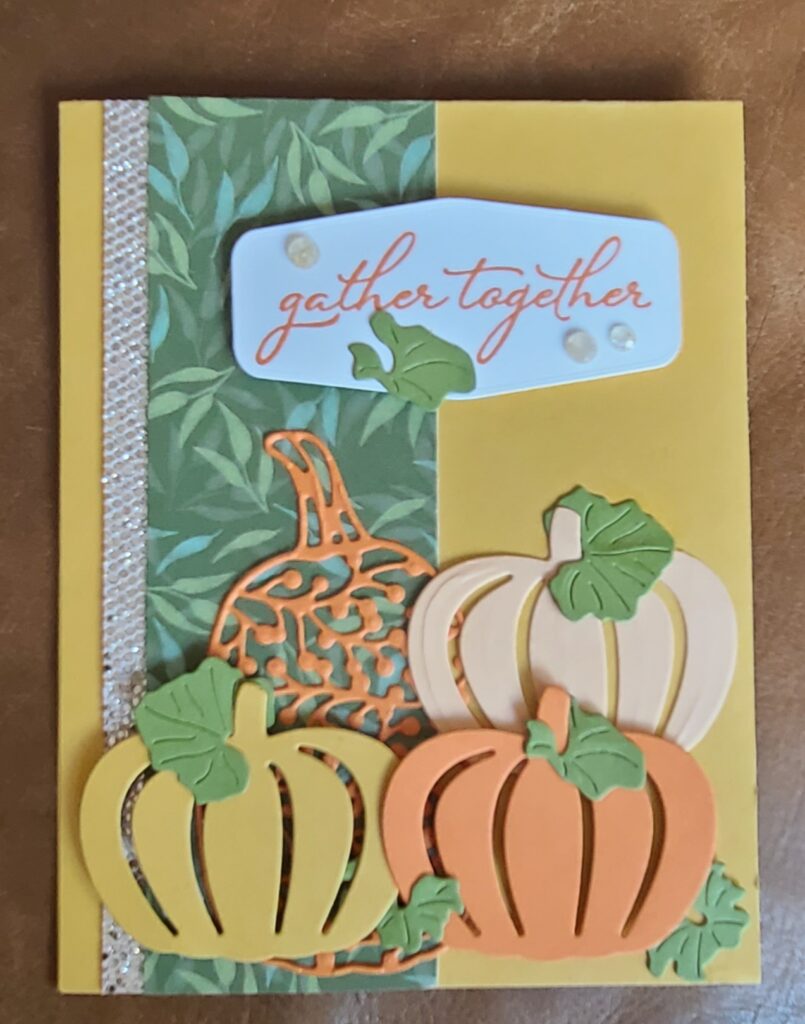
Bumblebee base 4 ¼”x11” score at 5 ½”
Basic White 5 ¼”x 4” & 3”x 1 ½”
Garden Lane 5 ½”x 1 ¾”
Pale papaya/pumpkin pie/bumblebee 2 ¼”x2”
Pumpkin pie 2 ¼”x 3 ¾”
Old Olive 1”x 3”
Be Dazzling ½”x5 ½”
Wonderful Gems
Pumpkin Pie ink
Adhesive sheet
Tasteful labels dies
Seal/mini-dimensionals/glue
- Adhere the Be Dazzling to the DSP. Adhere with seal to the front left side of the card with ¼” reveal
- Cut 3 of slotted pumpkins from different card stock. Add adhesive sheet to the Pumpkin Pie 2 ¼”x3 ¾” and cut with pumpkin viny die. Adhere to the DSP near bottom of the card
- Adhere the pale papaya next to the viny die-cut
- Adhere the other 2 slotted pumpkins with mini-dimensionals
- Cut 6 leaves from old olive & adhere with glue to the pumpkins
- Stamp sentiment in pumpkin pie ink on the 3”x 1 ½” & cut with tasteful labels die. Adhere with dimensionals – add 1 leaf to the bottom & add some wonderful gems
Fresh Freesia base 4 ¼”x11” score at 5 ½”
Gold foil 5 ¼”x4”
Basic White (BW) 5 ¼”x4” & 3 ¾”x5”
Wonderful Gems
Basic Grey ink
Versa mark marker
Gold ink pen & blends
Seal/dimensionals
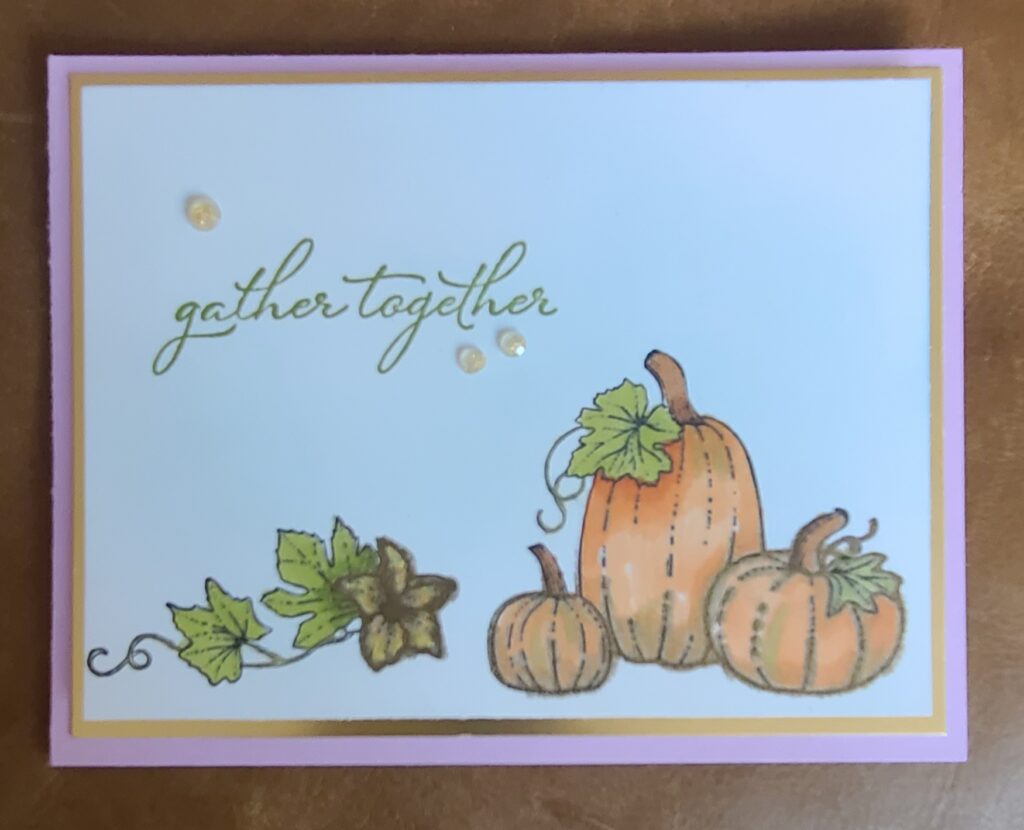
- On the 3 ¾”x5” stamp tri-pumpkins & the vine with blooming flower in Basic Grey ink.
- Stamp the sentiment in upper 3rd left
- On the left pumpkin use the marker to outline/bottom of the middle/right outline the entire pumpkin/flower, use the gold embossing powder & heat with heat tool
- Use the gold pen to do the vines
- Color with you choice of medium
- Adhere the gold foil to the front of the card
- Adhere the sentiment with dimensionals to the gold foil
- Adhere the 5 ¼”x4” to the inside of the card
Pumpkin Pie base 4 ¼”x11” score at 5 ½”
Copper/Silver foil 6” square
Gold foil 2 ¼”x2”
Garden Lane 5 ¼”x4”
Pumpkin Pie 4 “x 2 ¾”
Basic Grey ink
Seal/dimensionals/glue
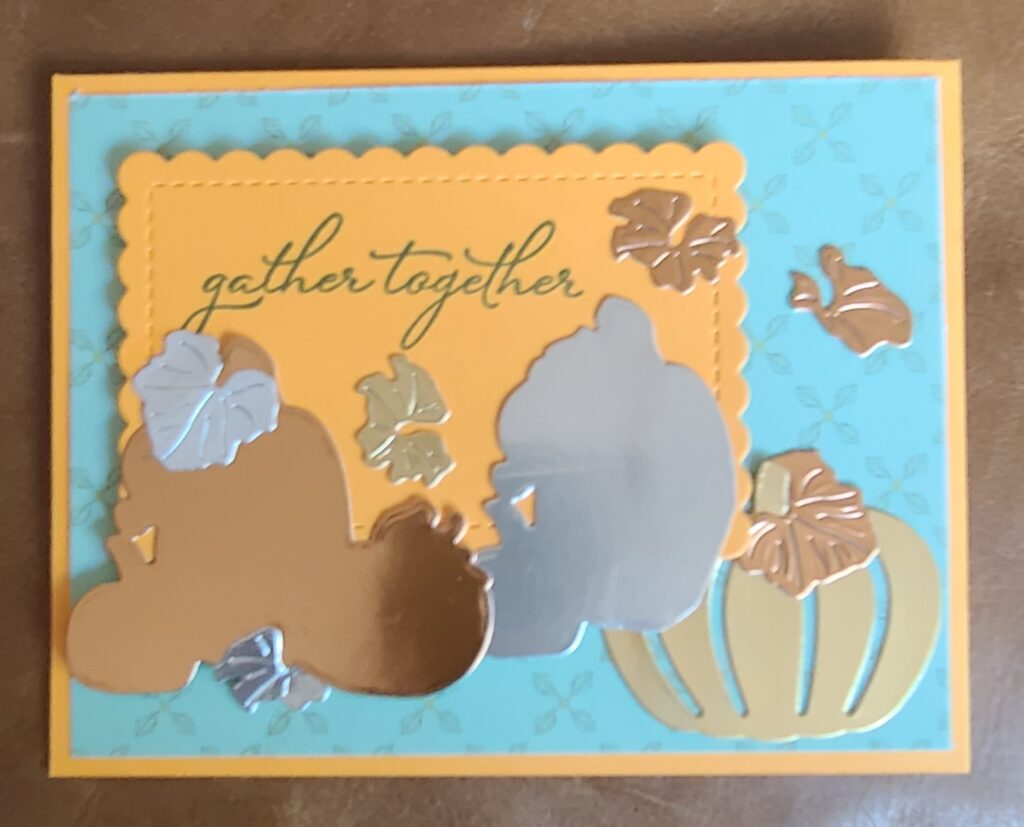
- Adhere the DSP to the front of the card
- Cut slotted gold pumpkin from the gold foil & a couple of leaves. Adhere the slotted pumpkin to the lower right with seal
- Stamp the sentiment in upper left side in Basic Grey. Adhere the sentiment in upper left with dimensionals
- Cut 2 of the tri-pumpkins from the Copper & Silver foil. Cut several leaves from the silver/copper as well
- Adhere the copper tri-pumpkin with seal & dimensional. Cut the right pumpkin off the silver tri-pumpkin & adhere the with seal & dimensional.
- Adhere the leaves with glue on the slotted pumpkin and the copper pumpkin – adhere the others around the pumpkins & sentiment
Get your crafty on!
Francine Wilson
Independent Stampin’ Up! Demonstrator
Stampscrapgo.com
Facebook.com/stampscraogo
[email protected]
Product List

