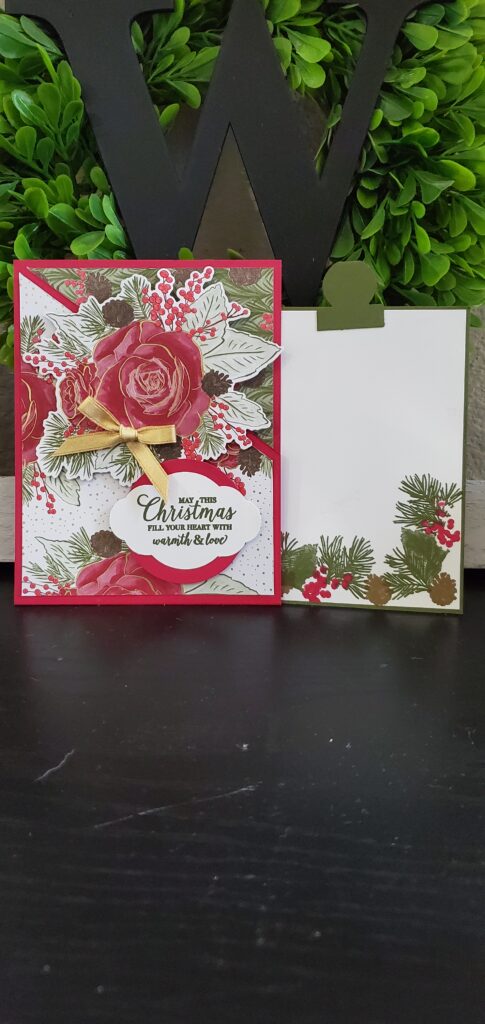
Recipe:
Card base is 11″x4 1/4″ scored at 5 1/2″
DSP is 5 1/4″x4″ and 5 1/8″x4″
insert base is 4 3/4″x3 1/2″ and whisper white 4 5/8″x3 3/8″ scrap whisper white & card base scrap.
Circle tab punch Dimensionals and Snail ribbon
Instructions:
The insert is very simple. Stamp an image near the bottom of the whisper white 4 5/8″x 3 3/8″ and add any sentiment (if you choose too). Adhere this to the insert base with snail. Punch the circle tab from scrap to match insert base and adhere with snail at the top, centered.
Now for the fun part! I had a bit of trouble with this at first, but I managed to figure it out. Before you fold your card, on one end make a mark at 3″ on one side. You can choose which side you want your angle to be on by the way you fold the card. Place the 3″ mark at the trimmer gutter and move the opposite corner to the gutter. It should be a perfect angle cut. Now you decide which way you want the angle to left or right by the way you fold the card.
Now for the DSP. After you determine your angle, you will cut your DSP in the same manner as the first angle cut. Mark 3″ and line up the opposite corner & the 3″ mark on the trimmer gutter.
Adhere (with snail) the DSP to your card with 1/8″ reveal from the edges. On the long edge of the card (full 11″) run tear tape as close the inside, outer edge as possible. Pull the release paper and fold your card. The long edge should be sealed tight. Your insert should fit properly inside the card at this point.
Now to decorate the outside of the card. Using g the scrap whisper white, stamp a sentiment and use whatever punches or dies you have to cut it out. Adhere it to a matching piece of card base card stock. I cut out one of the floral designs and set that I place before I adhered my sentiment and used dimensionals for both. I added a little ribbon bow as an embellishment with a glue dot and voila, I am finished.
Keep on stampin’
Francine
Product List


